Thursday, December 12, 2013

Making Of...

This is the 'Making Of'' for our short film, Katie. Took a while but was a bit easier to put together because of the practice I got from editing our final film. Although a bit tedious to add all the images as well as fade the video footage into each other, the end result is very rewarding.

These are just a few of the experiences we went through in production.


Making Of


Wednesday, December 4, 2013

The Final Product...

It's finally done! After 9 weeks of hard work, it's finally completed!

All the way through pre-production to post production it was quite a struggle to get this far, but so glad it's finished.

View the final result at this link: Katie

Thanks for staying tuned thus far and big thanks to my team for contributing and pushing onward to this projects completion.

HOPE YOU ENJOY!!!

Please feel free to leave comments.

Monday, December 2, 2013

Editing...

We are running way behind schedule and have encountered multiple problems from rigging mishaps to animation flops and rendering faults. I have been put in charge to edit everything together since I'm more experienced with editing programs than everyone else.


Compiled Render Composition

Firstly I compiled all our rendered scenes in the correct order. I imported them as Targa sequences because they were rendered in Targa format. I made sure that all our scenes had not time gaps in the timeline and then I began to apply all the effects needed in our film. I added plain font for our new title "Katie". It was agreed that our first title was not a good fit anymore and having a different title was more appropriate. I personally was glad that our title was changed, even if it was a very simple title.


Added Sound

After all the scenes, effects and ending credits were edited, our sound effects and soundtracks were added. Hope helped me edit the voices for Katie. With Jitesh's help we found a great backing soundtrack for the dream sequence and I used the other soundtracks that I had found for the final scenes and credits. Regrettably I ran out of time to add more sounds to the ending scenes of the dream sequence.

I would have preferred that we had more time for editing but we had no more time to spare. Even though everything wasn't edited exactly the way I wanted, our final edit was still pretty good.

Thursday, November 28, 2013

Scene 19 Final...

Scene 19 Final


This is one of our smaller scenes near the end of the dream sequence. 50 frames in total, 2 seconds of animation. Not quite the amazing animation scene but relevant none-the-less. Although you can see Katie's hand freeze just below the screen, its laying outside of our render camera which means it won't be seen in our final rendered composition.

Wednesday, November 27, 2013

Scene 11 Partial...

Shot 11 In Progress


This scene was only supposed to have a single butterfly in it but after it was referenced in, the scene still looked too spacious. So respectively I had to duplicate the original butterfly two more times, changed the texture colours for one duplicate to red and the other to yellow and then referenced both into scene 11. The group all agreed that it looked better. Then I proceeded to animate, using the exact timing on all of them then offsetting the timing using the Graph Editor. The scene was to be complete by Zack.


Shot 11 Render


This is a render image of scene 11 final. It turned out better than I expected. The lighting done by Jitesh and Zack really enhanced the glow of the butterfly.

Tuesday, November 26, 2013

Scene 9 - 10 Final...

Scene 9 - 10 Final


Finished animating scene 9 and 10. I felt it worked well despite my constant problems with Katie's feet warping at random times. My walk cycle is consistent and well planned. There are teeny tiny rotations in the hips but not quite seen from the camera angles here. Was not able to rotate as far as I wanted without distorting Katie's knees and feet further. I decided to have Katie stop for a while to observe the bridge construction before carrying on drawing and moving forward. The team and I felt this was necessary to give time for the bridge to fully build and not have Katie simply zoom over it like in the animatic and storyboards. I also tried to add some small secondary movement in her ponytail but like Katies hip rotations, its not quite noticeable.

Scene 9 Render


This is a final render image from scene 9. It turned out better than I expected. Jitesh did a great job adjusting our final lighting for the dream world. All our renders look great so far.

Scene 10 Render


Thankfully scene 10's final render is just as good as scene 9's because they were animated together.

Monday, November 25, 2013

Scene 9 - 10 In Progress...

Scene 9 - 10 In Progress


Here I've animated the beginning of scene 9 and 10. We decided to have these scenes animated together to keep the consistency of the bridge when it constructs itself. 
All the flowers had already been animated through blend shapes when I'd referenced them in the layout phase. So I just changed the timing for all of them, offsetting the keys through the graph editor so that the flowers closest to the puzzled side edges would animate first followed by the rest inwards towards the bridge. The bridge itself builds forward, plank by plank followed by the pieces of the rail.

Thursday, November 21, 2013

Sound...

Sound is crucial to our production, especially since the end of our short film is solely depending on sound to deliver the ending twist. It did take a while to find a whole bunch of necessary sounds for the production but I managed to find quite a few sound effects as well as some good tracks to play in the final scenes. I kept consulting the whole team and collectively we filtered out which ones we liked and disliked.

Here are just a few links to the sounds that will be in the final film.

This is the heartbeat sound needed for the final scene.

This short tune will be playing during the hospital scene.

This short piano tune will be used for our credits.


We've used a lot of sounds and can't list/link them all here.
However, all of the sound effects we will be using can be found at http://freesound.org/. We decided to use this site because all the sound is free for use in non-profit productions.

All the providers of these sounds will be credited in our final assessment submission.

Wednesday, November 20, 2013

Sketchbook Crayon Drawings...

Before we began rendering I realized that the scenes were missing the pictures that Katie draws within the dream world. So I quickly whipped these up for the appropriate scenes where the sketchbook will be seen within the shots. Notice that I stylized the drawings the same way as the Hospital Room drawings.

Sketchbook Drawing Scene 4

This is very first image Katie draws in the dreamworld. I simply referenced this image to the Tyre Swing Tree that we had already modelled.


Sketchbook Drawing Scene 9

Scene 9 is a high angled down shot which shows the sketchbook clearly. This scene is where the bridge builds itself.


Sketchbook Drawing Scene 13-14

This is Katie's last drawing before becoming ill in scene 13 just after the butterflies fly by. More visible in scene 14 when the sketchbook drops to the ground.


I also had to draw up a few more crayon pictures for Katie's hospital room because there were extra pictures in the final hospital room layout.


Detty The Teddy Bear


Detty is Katie's personal bodyguard. He protects her when she goes to sleep. He also makes appearances in the dream world and in the hospital.


Blockee Cubes

Blockee Cubes block secrets from getting out. Unless you can decipher the word they represent, you will never know the secret.

Tuesday, November 19, 2013

Environment Re-edit...

Encountered multiple problems through the importation of the flowers which were morphed using blended shapes.


Dreamworld Final

Our final look for the Dreamworld. 

All the objects in grey have their textures turned off because the scene would lag majorly if they were on. This was the biggest problem we encountered. After Jitesh helped me import the flowers, I reordered them into our scene and made sure they were visually appealing for all our appropriate camera shots. As I turned on the textures the computer froze.


Dreamworld Wireframe

We had to revert to working in wireframe mode as to try and reduce the computers processing time while we animate but because all the flowers have already been animated with blend shapes there was still a bit of lag. This was also due to having all the multiple blend shapes within the scene. We tried to delete all the blend shapes but that just messed up the animations of the flowers.

Dreamworld Bounding Box

So we tried putting everything in Bounding Box mode as to fully reduce processing time which allowed the computer to run fine. But it would be very difficult to animate in this mode because you wouldn't be able to visualize anything animated.


Flower Blend Shape Groups

This is just half of the blend shapes of the flowers that we have in our Dreamworld environment.


Flower Blend Shape Army

These are all the blend shapes for the flowers. There were just too many shapes that I couldn't separate them all so I just left them overlapping each other. They were hidden off camera anyway. This probably was the biggest contributor to crashing Maya several times. But they were necessary to be there for our flower morphs to work.


With help from Jitesh and immense help from our tutor Raj we came up with a solution after trying all the options above. So I just went through all the individual shot layouts and deleted everything that wouldn't be seen within the shot. Went into the outliner and deleted objects at a time, even entire groups. Most annoyingly the blend shapes that weren't needed for any animation in certain scenes. Deleted all unused layers and unused texture nodes from the Hypershade. This was was extremely daunting but highly rewarding as our scenes no longer lag or freeze with the textures on.

Monday, November 18, 2013

Layouts...

Did some of the layouts for the beginning scenes, all ready for animation.


Scene 3 Layout

This is the scene when Katie first draws on the sketchbook.


Scene 4 Layout

Katie's first picture is revealed in this scene before she moves her sketchbook down to reveal the "Tyre Swing Tree" materialized behind it.


Scene 6 Layout

In this scene Katie begins to walk off as a flower grows beside her foot.


I double checked that everything was in order from character placement to camera placement.

Thursday, November 14, 2013

Katie's Crayon Drawings...

These are images that I drew for the wall pictures of Katie's hospital room in the real world. Collectively as a group we've always wanted crayon styled images since the very beginning, so I basically used a splatter brush in Photoshop and played with the settings to try and emulate that effect. As per our story, the images drawn reflect and relate to the objects that appear within Katie's Dream World. Although these may seem like they were just scribbled up, I did have a thinking process while I was creating these images.

Here are some of the reasons why "Katie" drew these each with their own little stories.


The Glob Tree


This is one of the trees in our story. It's a purple blob-like tree that Katie has fittingly named "The Glob Tree". Pieces of it float and orbit around the main blob. It excretes feelings of comfort and happiness.


Never-ending Chocolate

Chocolate is one of the many things that can cause greed. But it also has the potential to enhance the spirit of sharing. But with Never-ending Chocolate you'll never have to be greedy or share because it'll never run out. It can feed everyone.


Golly Lollipops

The only thing better than lollipops are giant Golly Lollipops. Besides being yummy and sweet, they are able hypnotize "Meanies" and keep the "Badness-ness's''  away.


Bye Bye, Flutter By


Flutter By is one of the creatures in Katie's world that spreads joy. He glows brightly to light the way at night and helps 


Best Flowers Forever

Katie's world is populated by a lot of friendly flowers which have all been individually named by her. These are some of Katie's closest flower friends -
Binky the cheerful, Frin the helpful and Figma the funny.

Crossing Bridget

This is Bridget the Bridge. She helps those in need get to where they need to go and guides them in the right direction.


Licorice Riddle Sticks


These licorice sticks grow up from the ground. It you are able to find the answer to their riddles you may be granted a "special treasure". This is also my own personal easter egg for one of my favorite Final Fantasy games.


I CAN CONTROL RAINBOWS!

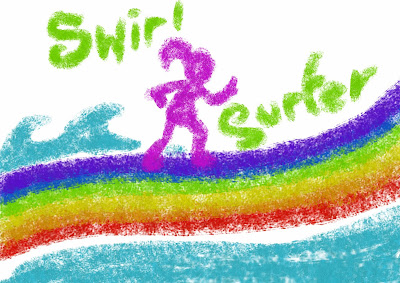
Swirl Surfer is Katie's superhero alter ego. She possesses the power to create and control rainbow swirls. She also travels by surfing on them. Can change the colours of anything by touch.

Beautyflies  

Glowing butterflies collecting nectar from the friendly flowers. The nectar helps them glow brighter.
Starfish Smash

One of Katies favorite Saturday morning cartoons called "Starfish Smash". It's about a naughty boy named Tierone who was just a little terror. His horrible actions finally result in himself being terrorized by a giant Starfish. This is an easter egg for Group 1's story.


Imaginary Skies

This is a picture Katie drew from one of her favorite story books, "Imaginary Skies". Very relate-able to Katie because she has a very big imagination as well. This is an easter egg for Group 3's story.


Mr Nagaraj

Katie's favorite teacher, Mr Nagaraj. This is another easter egg and a small dedication to our 3D tutor Raj.


And that's about it. It was fun drawing these pictures. All these images will be in the ending scenes of our short film. This is very much a showcase of my inner 6 year old girl! Lol!

Wednesday, November 13, 2013

Butterfly Texture...

Butterfly Texture

Getting closer to animating scene 11 I almost forgot to paint up textures for the butterfly. Uv'd the butterfly wings and body then painted textures using Photoshop following my final butterfly design. The antenna's, eyes and legs have plain blinn materials applied.


Butterfly Texture Applied

At first I applied a blinn material to the wings but they were too shiny and reflective. So I changed the applied material to lambert. Also added a glow effect to both wings.


Butterfly Close Up


The butterfly's looking pretty good and the textures don't distort at all.


Butterfly Render Test


The glow effect looks super bright in this picture because there are no lights. But it will look more believable in the fully lit scene.

Tuesday, November 12, 2013

Bunny Slippers...


Final Bunny Slipper Texture

This is the final texture for Katie's bunny slipper. The UV's are a bit messed up because we were short of time. I only coloured the parts we needed which consists of the top and bottom faces and the slipper ears. This one singular texture was applied to both slippers and worked really well despite the UV catastrophe.


Applied Bunny Slipper Textures

This is what the textures looked like when applied.  Although our slippers have somewhat evolved from our final model sheet version, but the changes were necessary for rigging purposes. They still look like bunnies so that's fine.

Bunny Slipper Render Test (Bottom)

Paw prints on the soles just for a more creative feel. It won't look so boring if the bottoms are ever shown on camera in any of our shots.

.Bunny Slipper Render Test (Top)

Looking good from the top view also. Lighting will be fixed later in production.

Monday, November 11, 2013

Pajamas...

Final Pajama Shirt Texture 

Had to redo the UV for the collar because it previously wasn't unfolded. Applied some more patterns but kept them away from the seams where the UV cuts are. I previously was going to try and match overlapping patterns with the opposing sides but it didn't really work because there was some stretching near the edges where the cuts were. Did some basic shading around the edges to give it a nice tonal gradient so the colours wouldn't look too bland.


Final Pajama Shorts Texture 

Shorts were pretty simple because they're just one colour. Added a little shading on the sides and middle as well.


Applied Pajama Textures (Front)

Textures looked pretty good when applied. Everyone agreed that they looked okay.


Applied Pajama Textures (Back)

Notice how they are no patterns directly on her sides where the UV cuts were made. Those empty spaces aren't too noticeable because I put some patterns close to the cut edges.

Render Test


This is our test render using Mental Ray. It really gives a soft feel to Katie which is what we are aiming for. She looks a bit pale due to our use of physical sun and sky light simulation. This will be fixed later on.

Thursday, November 7, 2013

Texture Test...


Rough Pajama Shirt Texture

This is the beginning of the texture stage for Katies pajama shirt. Just laid down the foundation colours exactly as they are from our final model sheet. I even used the same bunny and flower patterns. So I'm trying my hardest to stick to the final model sheet as much as possible.


Applied Pajama Shirt Texture (Test)

Modeled by Marc Dagatan and UV'd by Jitesh Thakolal. Just some rough texturing for the shirt to see how it would look. Works fine but just some problems with the seams on her sides that cause a bit of stretching and distortion. Not too much of a problem.


Rough Hair Texture

The hair was giving us a lot of trouble simply because of all the different shaped hair strands. After they were UV'd again where the cutting around the edge gave betters results, I rustled up this pile of mess just to test how it would look and clearly show if the UV's matched up properly.

Applied Hair Texture (Test)

Here I did a very rough hair texture with some darker highlights. Can't really see too much of the effect but will work more on it later.

Wednesday, November 6, 2013

Butterfly Modelling...

Butterfly Model

Used a pipe to model the body. Then used a pipe to model one antenna, a sphere for one eye, a plane for one wing, and pipes for three legs which where all special duplicated for the other side.


This is probably the only thing that I've modelled through the whole project because everyone had already gone crazy modelling everything else.

Butterfly Expression


After I made the wing pivots snap to the most inner wing edges closest to the body I then created an expression for the left wing, linking the x rotation to the right wing. But I made this expression influence the negative value of the right wing rotation so that it would rotate the opposite direction of the left wing. This was to make it easier for the wings to flap when animating.